Again dear Microsoft, why do you harden our life when you could make it easier?
Yesterday I was able to install Access Database Engine to connect the .ASP application to its database. But because getting
An unhandled win32 exception occurred in w3wp.exe
all the times, I thought it is time to change to MS SQL Express.
- Installed MS SQL. Few GBs not much.
- Installed SQL Server Management Studio (the installer is 830MB while MySQL Workbench installer is 23MB).
- Migrated the data with SQL Server 2016 Import and Export Wizard. Was quite easy because I had already installed the Access Database Engine connector.
So I had everything to start using with the .ASP. But I knew I need a user for the connection.
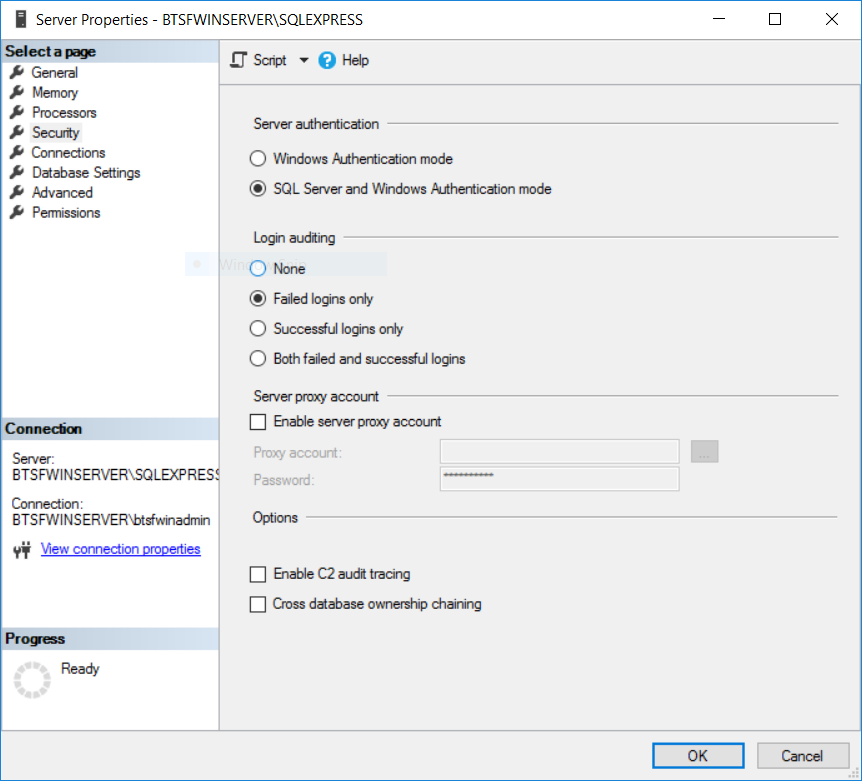
The first of all only some documentation mentions that you have to enable SQL Server Authentication. Not having this option enabled you will get login failed. Beside that you are able to create the user add password add roles everything without a simple warning that you won’t be able to use it. Haha.

When set you have to restart the SQL agent. You can use SQL Configuration Manager for this. A tool designed for this. I could not find the service stop start within Windows.
#service mysql restart
Isn’t this more simple? Okay now You could use PowerShell for this.
Secondly, by default you can only create users with a password in a contained database. Why? Don’t know. Maybe life can be too easy.
So again asking stackoverflow what to do. Here is the solution:
exec sp_configure 'contained database authentication', 1
go
reconfigure
go

alter database YourDatabase
set containment = partial
go
Here we go. So now you are able to create a user with a password. Simple, isn’t it?
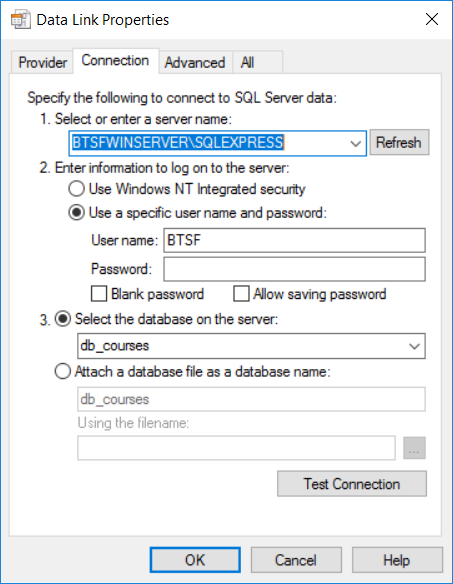
Finally you can test the connection by creating a TestConnection.udl file somewhere in your server. Then double click on it and test the connection with the specific user name and password.

And all of these can be made with one single command in MySQL without any hocus-pocus:
>grant all on (databasename).* to 'username'@'localhost' identified by 'password';
Cheers.